Pumpkin Carving 101
Part 3: Prolonging The Life Of A Carved Halloween Pumpkin
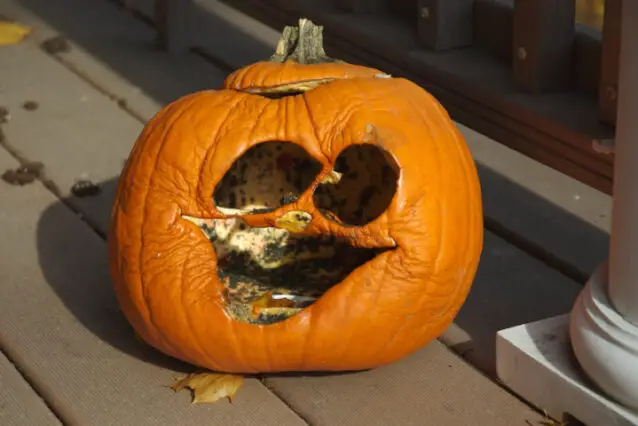
 Did you know that a carved pumpkin will start to dry out in only FOUR days?
It’s true.
Pumpkins are made up of 90% water, and once they start to lose their moisture, they start shrinking.
Here are some tips to prolong the look (and the life) of your carved pumpkin.
Make Your Pumpkin Last Longer
- Coat all of the exposed flesh of the pumpkin with petroleum jelly immediately after carving, including a light coating of the entire inside of the pumpkin. The most important thing is to coat the design that you’ve carved. You can use a Q-tip to rub the petroleum jelly on all of the cut parts to make your creation last much longer.
- You can usually restore a shrunk pumpkin back to its original condition by soaking it in cold water overnight. If the pumpkin is carved, put the carved part face-down. Let the pumpkin float, and let the insides fill with water. After 8 hours or so, the pumpkin will absorb the water and become very firm.
- Washing the inside of your pumpkin with a mild bleach solution will slow the process of decay. Any time you have a wet pumpkin you want to display, you should immediately dry it off to prevent mold from growing. Putting a little unscented Clorox bleach in the water will also prevent your pumpkin from prematurely molding.
- To avoid cooking your pumpkin from the inside out, use a sharp pointed object to vent hole in the top of your pumpkin. This will allow most of the heat to escape and make your pumpkin last much longer. (After the candle smoke has blackened a spot on the lid, use the Lid-Cutter Saw to cut a 1″-diameter hole for a chimney at that spot to vent the smoke and heat.)
…on to Part 4: How To Photograph A Pumpkin’s Glow & Kids In Costumes

If there is ONE thing I like… it's C H A N G E! The four seasons and major holidays are my favorite times of the year to recharge — and redecorate. I mostly like to share frugal DIY ideas for seasonal home decorating and party planning (for both, indoors and outside). Because who doesn't enjoy entertaining at home?! But even if you don't host many parties, I think you'll appreciate my DIY hacks and clever ways to decorate your house for the major holidays including Halloween, Thanksgiving, Christmas. Because those are the times when people tend to have the most visitors and overnight houseguests.