Lighting a pumpkin with a candle is so last year.
These days, there are a lot better ways to light pumpkins than using candles (…with hot flames).
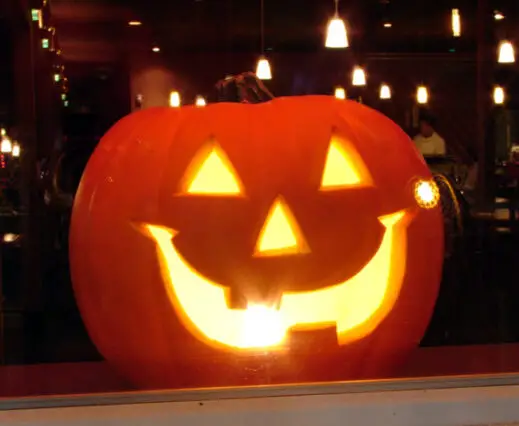
So now that you’ve carved your pumpkins and created some of the coolest designs, it’s time to light those pumpkins and bring life to your designs.

Here’s how to light a pumpkin without a candle…
#1 – Glow sticks

By placing a few glow sticks inside a carved pumpkin, you’ll create a soft glow rather than a bright light and the light itself will last a very long time.
Since they’re not all that bright, glow sticks are best for lighting smaller pumpkins.
You can use regular glow sticks — like those you get at parties and outdoor events.
Or, you could purchase glow sticks that are made for use in Halloween pumpkins.
For larger pumpkins, high-intensity glow sticks are your best bet since they’re brighter — they just won’t last as long. If you want Halloween-specific ones, these battery-operated Halloween glow sticks might work.
#2 – Pumpkin light stand

This pumpkin light stand is super practical!
A bright light bulb is built right into the base, plus you get all of the benefits of having a protective stand to place your carved pumpkin on.
There’s a 6-foot cord that makes it easy to turn on and off the light, or you could plug it into a light timer and never have to worry about turning on/off your lighted pumpkin every night.
#3 – Christmas lights

The best part about using Christmas lights to light a pumpkin is you can just stuff them all inside and have hours of bright light with very little effort. And if you use all one color of Christmas lights (like green, red, or purple) or twinkling Christmas lights (either white or multi-color), you could have a really unique effect.
But don’t think you always have to tuck the entire string of Christmas lights inside the pumpkin. You could also get creative and use some of the Christmas lights as ‘hair’ on top of the pumpkin’s head!
In fact, a string of tiny white lights and a drill are all you need to create celestial pumpkins that look heavenly. No carving required. Here’s how to do it.
#4 – LED lights

LED lights are really bright; brighter than regular bulb lights.
The most frugal way to use LED lights is to repurpose one that you already have. For example, most of us have at least one of those battery-operated LED push lights that they sell for use inside closets, stairways, etc. Just stick one of them inside your carved pumpkin and wah-lah… you have light!
The most fun way to use LED lights is to purchase one made specifically for use in carved pumpkins. For example, they have yellow flickering LED pumpkin lights (my personal favorite), as well as color-changing LED pumpkin lights, and even an LED strobe light for pumpkins.
#5 – Mini LED flashlights

You can also place one or more small LED flashlights inside a carved pumpkin to produce a bright, long-lasting light.
Two of them will add dimension and shadows in a way that a single flashlight alone cannot.
Some people still use just one regular (large) flashlight inside their carved pumpkins, but the larger they are the more noticeable they are, in my opinion.
#6 – Flameless candle tealights

Okay, so this one is technically a candle, but it’s much better than using a real candle.
If you use flameless candles that are tealight size, they will tuck way down into the bottom of your pumpkin. (Hint: Try using 2 or 3 or even 4 flameless tealight candles inside your pumpkin for added flicker and brighter light!)
My favorite candles to use inside Halloween pumpkins are these pumpkin color flameless tealights. Since they’re orange, they blend in well with the side walls of your pumpkin. Plus, they flicker and look just like real candles.
How To Choose A Pumpkin That Will Look Great With Light
1) Thick or Thin?
The thinner the walls of your pumpkin are, the more the light will shine through. If your pumpkin has thin walls, it will be easier to see the finer details of your pumpkin carving. As a rule, heavier pumpkins tend to have thicker walls, so try to choose lighter pumpkins instead. One way to find a healthy pumpkin is to tap on the side. You want to hear a slight hallow sound; not a loud thud.
2) Hard or Soft?
A hard outer shell of a pumpkin will be more difficult to pierce with carving tools. It will also be more difficult for you to guide those tools into meaningful lines and shapes. On the other hand, a soft outer shell won’t hold the fines lines and details of intricate carvings; your masterpiece could turn to mush right in your hands. So you want to look for a pumpkin that it somewhere in between: hard enough to maintain the fine details of your carving, yet soft enough to actually get through the skin and carve with accuracy.
3) Steady or Wobbly?
The flatter the base of your pumpkin, the sturdier it will be. If you’re going to use an actual flame from a candle, for example, then you definitely want a pumpkin with a very flat base.
4) Carve a Lot or a Little?
The more you carve out the sides of your pumpkin, the more the light will shine through. So, if possible, carve the front and the back of your pumpkin… or maybe the front and the sides.
Don’t miss these tips for photographing lit pumpkins and Halloween lights at night!

If there is ONE thing I like… it's C H A N G E! The four seasons and major holidays are my favorite times of the year to recharge — and redecorate. I mostly like to share frugal DIY ideas for seasonal home decorating and party planning (for both, indoors and outside). Because who doesn't enjoy entertaining at home?! But even if you don't host many parties, I think you'll appreciate my DIY hacks and clever ways to decorate your house for the major holidays including Halloween, Thanksgiving, Christmas. Because those are the times when people tend to have the most visitors and overnight houseguests.