Like usual, we procrastinated (actually just too busy) and we didn’t get around to carving our pumpkins until 1 hour before the trick-or-treaters started arriving.
Anyway, these are the pumpkins we decided to carve this year:
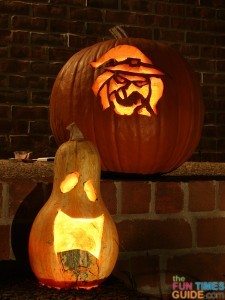
- 1 witch
- 1 ghost
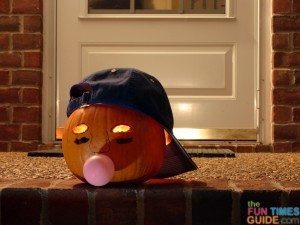
- 1 baseball cap wearing bubble blower
- 2 happy, smiling gourds
Here’s how we made each one…
We had carved the Witch and the Ghost in years past. They’re both sort of 3-dimensional, and they look really cool close-up.
New for us this year were the Gourds, and the Baseball Cap Wearing Bubble Blower.
In addition to the Jeep pumpkin we carved earlier, these are our all-time favorite pumpkins to carve.
If you’re interested in trying these yourself, first, check out our easy-to-follow, step-by-step directionsfor carving pumpkins in general.
Then follow these extra tips specifically for these unique pumpkins…
Witch and Ghost Pumpkins
How to carve the witch and ghost pumpkins: Using the templates we’ve scanned for the Witch and the Ghost (or Bats, or Haunted House), remember to work from the center of the design outward to avoid putting pressure on areas already carved (since the pumpkin becomes weaker each time you remove a piece). And you get the best effects if you only carve through about half the thickness of the pumpkin’s flesh in some places. (It looks 3-dimensional or shaded, allowing the light shows through at different intensities.)
Squash Gourds
How to carve the happy, smiling gourds: These are a very simple freehand project, and they make such an impact because so few people are doing it! After cutting off the bottom of the gourd (instead of the top), scrape out the insides as far up into the stem as you can. Note that the higher you scrape out the insides, the higher you can place the eyes. Simply hand-draw two eyes and a great big mouth — each in the size and shape of your choosing. (These Martha Stewart gourds were the inspiration for my fun Halloween gourds.)
Baseball Cap Wearing Bubble Blower Pumpkin
How to carve this baseball pumpkin: Cut out the bottom (rather than the top) of a small-to-medium sized pumpkin, then scrape out the insides and wash it out. Since the only part you’re actually carving on this little guy is a couple of eyes, you also have to carve a huge hole in the back so enough air can enter and exit to keep the candle lit inside. Draw thick black lines under the eyes, and lightly draw on a nose. Poke a very tiny hole where his mouth would be, then after blowing up a small pink water balloon, poke the tied end through that little hole. Finally top with a baseball cap — worn backwards! (This ballplayer pumpkin was my inspiration for this one.)
For us, next year’s pumpkin carvings will likely include:
- a bat that’s carved into a pumpkin and hanging upside down from some real, but very tiny tree limbs
- bat-o-lanterns made using tiny pumpkins
- a 3-tiered jack-o-lantern or scarecrow made out of pumpkins (similar to a snowman pumpkin)
- more happy (and scary!) butternut squash gourds lining each step to our porch
- pumpkins making silly faces while lying on their sides, using the stem as the nose
- double-sided carvings (this year, our “mistake” while carving one pumpkin, turned into a fairly clever 2-sided carved pumpkin!)
Lessons We’ve Learned
1. Don’t buy the pumpkins too early… they’ll start to rot. We bought ours early in October, and they barely made it to late in October! And it didn’t seem to matter what size they were. The outer skin on the very large ones started to shrivel ever-so-slightly as the days went by. And the skin of the gourds became moldy and squishy anywhere the gourd was touching a step (or another gourd). I guess they start to rot the fastest in the areas that are touching things. (Here’s how to prevent pumpkin shrinkage and rotting.)
2. Start carving earlier than 1 hour before the trick-or-treaters start arriving (…though it gives you something to talk about with all the parents at your doorstep!)
3. Remember to buy plenty of tea-light candles ahead of time. The larger pumpkins need more light. Plus, and the Bubble Blower pumpkin has such tiny carved spaces (just the 2 small eyes) so you need a really powerful light inside to be noticeable.


